
Tuesday, 24 January 2012
Kin and Cosmos. (Elvaston Castle - Music Video) [HD]
Basically a gloryfied family home movie, filmed on a clear day at the Elvaston Castle Public Estate In Derbyshire. Main purposes served were to test out the Canon 7D, try colour correction, sequence clips to music and test various other effects.
Photographs taken on the day and later Photoshopped can be found here:
http://www.flickr.com/photos/56511472@N08/sets/72157628969060289/
Derbyshire County Council plan to lease the estate to a private owner who plans to turn the estate into a hotel and golf complex. Please pledge your support to keep the beauty and rich history of Elvaston Castle alive to the public below:
http://www.elvastoncastle.org.uk/index.htm
Music:
"Silverspoon" by Meanwhileproject.ltd (http://www.myspace.com/meanwhileprojectltd)
Tuesday, 17 January 2012
Design Practice 3: Assignment 2: Projected Visuals: Inspiration & Brainstorming: Part 2
Now that my Influence search is over I brainstormed what it was that I actually wanted to do, these ideas are far and wide and completely preliminary. It is to be noted that I have selected my music track, the track I have chosen to accompany my visuals is track 8, mainly for its slower pace and sadder tone, which believe will match my visuals betters.

Brainstorm ideas include:
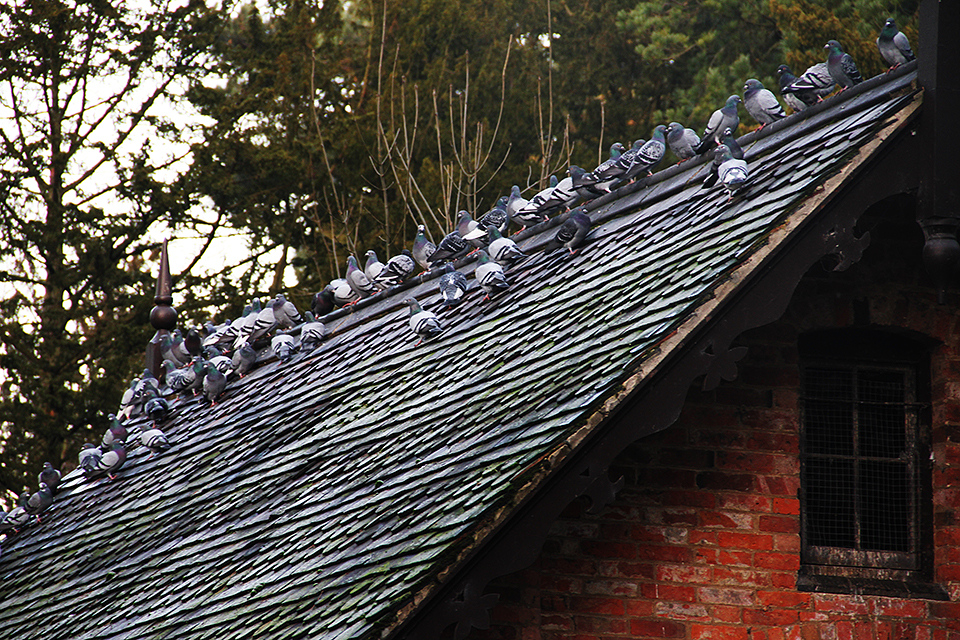
Here is a still image I shot last weekend which I wish to use with a time lapse sky, most likely my whole project will be a random collection of visuals like the above and below, as was stated in the opening brief they will not necessarily be synchronised to the music so there's no point in trying to create too much of a coherent structure.


Brainstorm ideas include:
Time lapse streets/cars and people, time lapses with stills, sky changes colour, travelling through 3d corridors, travelling through 3d with stills, travelling through 3D with green screen person, particle effects, energy effects ,3d earth, spinning stars, mirrors, running from mirror, surrounded by mirror, alive in mirror, ambiguous light, ipod style movement, static on a tv, cloning objects, white stripes style scaling, ink blotches and primitive shapes. Obviously they wont all be included but I have some good ideas to go on.
Here is a mock up video for some of my ideas including mirrors and scaling, not polished or anything.Here is a still image I shot last weekend which I wish to use with a time lapse sky, most likely my whole project will be a random collection of visuals like the above and below, as was stated in the opening brief they will not necessarily be synchronised to the music so there's no point in trying to create too much of a coherent structure.

Design Practice 3: Assignment 2: Projected Visuals: Inspiration & Brainstorming: Part 1
I have watched a considerable amount of live concert videos to gather up some inspiration for this project, a noticeable contributor has been T4 on the beach, they have a whole array of interest projected visuals, sometimes standing out more than the actual artists performance.
Here's one that uses falling fruit for the entire performance:
Another recommended to me was Beyonce Run The World, this one is spectacular, it uses a mixture of 3D models, primitive shapes, particle effects, cloning and other effects perfectly synchronised to the performance.
Another one that instantly came to mind was that off Gnarls Barkley - Crazy, that uses a sort of ink blotch effect throughout, this is the style:
A pre existing idea I had in mind for this project before it started was manipulating and using mirrors for abstract effects, mainly influenced by the abstract use of mirrors in The Shining

Design Practice 3: Assignment 2: Projected Visuals: Brief

Will the briefs never end?! No but seriously it's that time of year again, the time I have to make the awkward transition from relax mode to work mode. There's nothing more motivating to shake off the old dust then the brief post, It's the beginning of a new chapter, a fresh starting point to develop from.
This brief is entitled 'projected visuals' and is the result of a partnership between Nottingham Trent and Urban Angel, we are to produce a set of visuals (6-8 minutes long) to accompany one of fourteen hip/hop, these visuals will later be preformed to live, projected on stage behind the artists. The main outlining requirement is that these visuals have no recognisable narrative, they must be abstract and deviate away from genre conventions (e.g., girls on car bonnets, clubbing, fast cars).
The overall tone I received from the opening lecture was that of total creative freedom, the whole exercise has no right or wrongs, it's completely open to our own interpretation and encourages experimentation. Every question such as "Does it have to fit the theme of the music" and "How many projector are we using" was met with the reply "What ever you want", so I am to assume that I CAN do what ever I want, I will however not deviate from what the leading director at Urban Angel wants: Something not obvious.
Example of abtract Visuals
Canon 7D Practice
Ahhh my weakest point, camera technicality. I do have a very basic overview of how to operate a camera, I know about focus and the iris and also what format to record in, yet the finer points still allude me. As I don't come from a photography background and have never really been exposed to high end photography cameras such as SLR's and DLRS' I decided it was about time I learnt some basic skill and understood some of the terminology. I hired out a Canon D7 for the weekend to try and get to grips with how it works, this way when I film for real I'll not waste a load of time. I learnt three invaluable lessons.
1) Exposure is a mixture of ISO (the sensitivity at which your camera reacts to light, like volume on a radio) The Aperture (The amount of light let into the lens) and Shutter speed (The amount of time the shutter stays open to capture the light), You use all three settings to attain Good Exposure, adjusting for required scenes and situations.
2)The shutter speed is measured in seconds and fractions of seconds, opening it for longer can create a blurred effect on motion objects, such as waterfalls and moving light sources and is vital for recording time lapse photography, a faster speed takes a more crisp photo, such as on a fast car moving. Can also be used on record mode, you generally film at twice the speed as your frame rate, so 25fps would equal 1/50 shutter speed
3) The Aperture creates a depth of field it is measure by a Focal Value, so F2, F8, remember to press the depth of field preview button.
4) 100-400 ISO is a sunny day 400-800 indoors or evening and 800-1600 night time.
5) You must select the correct mode for the job, aperture priority for landscaped and portraits, shutter priority for moving objects and I believe Manuel if you want to experiment with the two.
Here's the good photo's I got with photoshop editing:


Sunday, 8 January 2012
Bruce Block: The Visual Story: Chapter 3: Space: Part 2
Carrying on from part one, the next space element identified is Flat Space. This type of space is opposite to that of Deep Space, it is the actual 2D space of an object or scene, no depth illusion is created. To achieve this effects the camera must be kept frontal and objects must all be positioned parallel to the camera to avoid size difference.

Other way to achieve flat space are to avoid object movement perpendicular to the camera, keep all movement parallel. You can also use Pan's, zooms and tilts, these don't create any depth cues as all the objects move in unison, there is no relative movement, with a zoom for example everything gets larger simultaneously.
Other ways to maintain flat space are to: have a detailed background, overwhelming ariel diffusion, no difference in tone, singular colours, same height in objects, no overlapping and blurred objects. It is also noted that reversing the deep space depths cues will often create a flatter image, for example having darker tones in foreground and lighter tones in background.
Limited Space is in between deep and flat space, it can only use frontal planes and can only use movement parallel to the camera, this eliminates the two strongest deep space visual cues. Yet you can maintain any other element mention before hand to create the illusion of depth. For example using multiple frontal planes with size difference and tonal separation would be limited space, think of it as two or three elaborately placed layers of glass in front of the camera.

Ambiguous Space is the final type mentioned, this replies on creating anxiety and a tense mood, often found throughout horror and thriller films. The tense mood come from being unable to identify the size and relationship of objects in frame, it is often achieved by tonal and textural camouflage (shadows and lights), mirror and reflections and disorienting camera angles, it is noted that for the effect to work the objects must be of unknown size.

Controlling space during production
Deep Space
1) Emphasise longitude planes
2) Use size change, arrange objects perpendicular to the camera, small in BG, large in FG. keep movement perpendicular
3) Move the camera, link movement to dramatic purpose
4) Tonal separation, light to dark, warm to cold
5) Use wide angled lens
Flat Space
1) Eliminate longitude planes
2) Stage objects parallel to picture plane, all movement parallel
3) Don't use dolly or crane movement, pans and zooms fine
4) No tonal separation, all one colour
5) Use telephoto lens
6) Use blurring
Part Two: The Frame
The second section of the chapter discusses space in relation to the size of the real world picture frame not just what we see in the screen world. Aspect ratio is explained, it is when you compare the portions of height of a frame to the portion of width, height is always 1, while width is how many times greater than the height it is. For example if a screens width is 200x and the screens height is 100x, the aspect ration would be 2.0:1, as the width is two times the size of the height.

 Contrast and Affinity
To summarise we learn that everything in the space chapter including surface divisions, deep space, flat space, limited space and ambiguous space can be related back to contrast and affinity. contrast and affinity of space can occur in shot, from shot to shot or from sequence to sequence. For example you could shoot a flat space to deep space shot to show contrast, or divide flat and deep space using surface divisions to show a contrast. Keep everything the same for several shots and you have affinity of space, mix contrast and affinity for best results. Deep space is however more inheritenly intense so keep that in mind, finally experiment to find out what works best for you

Other way to achieve flat space are to avoid object movement perpendicular to the camera, keep all movement parallel. You can also use Pan's, zooms and tilts, these don't create any depth cues as all the objects move in unison, there is no relative movement, with a zoom for example everything gets larger simultaneously.
Other ways to maintain flat space are to: have a detailed background, overwhelming ariel diffusion, no difference in tone, singular colours, same height in objects, no overlapping and blurred objects. It is also noted that reversing the deep space depths cues will often create a flatter image, for example having darker tones in foreground and lighter tones in background.
Limited Space is in between deep and flat space, it can only use frontal planes and can only use movement parallel to the camera, this eliminates the two strongest deep space visual cues. Yet you can maintain any other element mention before hand to create the illusion of depth. For example using multiple frontal planes with size difference and tonal separation would be limited space, think of it as two or three elaborately placed layers of glass in front of the camera.

Ambiguous Space is the final type mentioned, this replies on creating anxiety and a tense mood, often found throughout horror and thriller films. The tense mood come from being unable to identify the size and relationship of objects in frame, it is often achieved by tonal and textural camouflage (shadows and lights), mirror and reflections and disorienting camera angles, it is noted that for the effect to work the objects must be of unknown size.

Controlling space during production
Deep Space
1) Emphasise longitude planes
2) Use size change, arrange objects perpendicular to the camera, small in BG, large in FG. keep movement perpendicular
3) Move the camera, link movement to dramatic purpose
4) Tonal separation, light to dark, warm to cold
5) Use wide angled lens
Flat Space
1) Eliminate longitude planes
2) Stage objects parallel to picture plane, all movement parallel
3) Don't use dolly or crane movement, pans and zooms fine
4) No tonal separation, all one colour
5) Use telephoto lens
6) Use blurring
Part Two: The Frame
The second section of the chapter discusses space in relation to the size of the real world picture frame not just what we see in the screen world. Aspect ratio is explained, it is when you compare the portions of height of a frame to the portion of width, height is always 1, while width is how many times greater than the height it is. For example if a screens width is 200x and the screens height is 100x, the aspect ration would be 2.0:1, as the width is two times the size of the height.

It goes on to say that, anything which divides the frame into two or more areas is classed as a surface division, it can be shown by a visual split screen or an actual object in shot. For example it could be a door way, or a tonal change in a wall, a lighting change. Horizons can create a division in the middle, a doorway could create a rectangle division, a division of thirds could be a set of windows, surface division can emphasise similarity and difference between objects, the audience will compare and contrast each area of the frame.

To summarise we learn that everything in the space chapter including surface divisions, deep space, flat space, limited space and ambiguous space can be related back to contrast and affinity. contrast and affinity of space can occur in shot, from shot to shot or from sequence to sequence. For example you could shoot a flat space to deep space shot to show contrast, or divide flat and deep space using surface divisions to show a contrast. Keep everything the same for several shots and you have affinity of space, mix contrast and affinity for best results. Deep space is however more inheritenly intense so keep that in mind, finally experiment to find out what works best for you
Saturday, 7 January 2012
Photoshop Skill Improving.
Just had a little play around with photoshop, contrary to what most lecturers at Nottingham Trent think, not all student on the multi-media course have come from a strong photoshop background or even a I.T technical background for that matter. Last year when asked to make a title card for my short film noir film Shift I was left feeling pretty intimidated and useless, I could'nt do it. Now days I feel that I have naturally built up some photoshop illiteracy through general use over the years, I'm no expert by far but have at least squirmed out from the oblivious category. I recently watched the film noir classic A Touch of Evil by Orson Wells (which was fantastic by the way) and was reminded of my own film nori short Shift, I was inspired to revisit the old title card situation and create a fresh new one. With the film noir excitement still rushing through my veins, I created this:

Now I know it may not look much to the seasoned expert, but this is one of the first times I've made everything from scratch myself in photoshop, including textures and fonts... so I'm a little proud.
Now I know it may not look much to the seasoned expert, but this is one of the first times I've made everything from scratch myself in photoshop, including textures and fonts... so I'm a little proud.
Tuesday, 3 January 2012
Bruce Block: The Visual Story: Chapter 3: Space: Part 1
I have advanced onto chapter three of Bruce Blocks: The Visual Chapter, this chapter makes up about 30% of the book and concentrates on the complex nature of space in cinematography, both in terms of the space in the screen world (which will be discussed in this post) and the space in the real world, aka aspect ratios and the picture frame, which will be discussed in part two.
Deep Space is the first space element we learn. Deep space is the illusion of depth through specific depth cues. Think of it this way, if your viewing a flat plane such as a wall straight on it has no depth, however if you move the camera to the side you reveal depth, a One Point Perspective is created when the verges of an object appear to disappear into the distance, a classic example of this would be looking at a railroad track.

A Two Point Perspective uses two vanishing points, this can be created by lifting or lowering the camera so an object appears unparallelled, or simply by using two surfaces of an object, such as the corner of a building or the corner of a room. A 3 Point Perspective can be achieved by say altering the height of an image that has two surfaces to create a third vanishing point, for example looking up on a cornered building. Perspectives can be achieved on any object even actors, tilt the camera up or down and an actor gains perspective. Positioning objects in between vanishing points draws attention, changing from one perspective to another can be considered a visual progression.


Size Difference is when you position objects and actors in the forgroud, midground and backgroud to create depth, it is sometimes called staging in depth, objects in the FG will appear large while objects in BG will appear smaller.

Object Movement: parallel is any movement that is left, right, circular or diagonal to the picture plane, where as perpendicular is movement towards or away from the camera, either straight on or diagonal. Objects moving in The FG, MG and BG will create depth. Relative movement is created when two objects, one in FG and one in the BG move simultaneously, the background movement will appear to take longer than foreground movement, this all adds to the illusion of depth, a good example of parallel movement would be a man walking from the left of the screen to right, a good example of perpendicular movement and relative movement would be a plane taking off.
Camera Movement: Dolly movements creates depth between the Foreground and the Background, the Forground would appear to get larger faster than the Backgroud. The same occurs with tracking, the Foregroud will move past faster than the Backgroud creating a depth cue, same goes for crane shots, The foreground will dissapear quickly while the backgroud barely moves.
Deep Space can also be created by Diffusion, there are two types of diffusion Textual and Ariel. Textual is created when an object texture and detail diminish and become distorted, the more distorted an objects texture the further away they appear to be. Ariel is created by particles in the air, for example on a foggy day texture in the background will appear more diffused which creates depth. For diffusion to work you need an effected and unaffected appear.

Tonal Seperation, this one is reltively simple, viewers tend to percieve dark tones as further away than lighter tones, the same applyes to colours, the viewer would percieve a cool colour such as blue to be further away then say a warm colour such as red.

The last two depth cues are Up/Down Positioning and Focus, objects and people who are lower usually appear in foreground while higher objects and people appear further away. As for focus, a blurred backgroud will appear further away, while the unblurred object will appear closer.
Part Two covers Flat Space, Limited Space and Ambiguous Space

Subscribe to:
Posts (Atom)